This mobile application was specifically designed with the roofing contractor in mind. Accurately calculate the square footage of a roof while accounting for factors such as pitch and roof type. We use the most updated satellite imagery to provide you with the information you need to generate client estimates quickly and easily.
Where’s my License Key
To find your license key, follow these instructions
- Login to your main account at https://manage.roofing.com
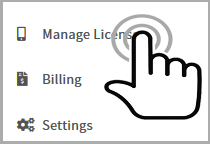
- Click on the link “Manage Licenses” from the navigation menu on the left side of the screen.
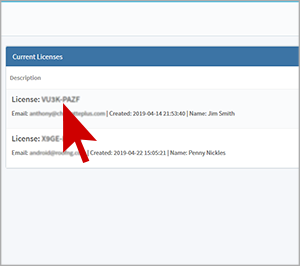
- Your License keys are provided under the section “Current Licenses”
Using The Measuring Tool
- Step 1 – Enter any existing US address in the address bar located at the top of your screen. The system will provide you with suggestions as you continue to type. Once the correct address appears, simply click that address. Upon a successful search, the map will zoom in to the property you entered.
- Step 2 – Click the red “Marker” to extend the zoom to its maximum zoom point. Depending on the location of the address, some properties may allow for a further zoom level than others.
- Step 3 – Click on the corners of the building to start measuring. Connected points can be moved to better detail the outline of the roof. In some cases, you may need more room to work. The main “Marker” can be dragged out of the way to maximize your workspace.
- Step 4 – To make corrections, you can delete a point by clicking the button Delete Point
- Step 5 – Once you complete an outline, that shape is placed on its own layer. You can create multiple layers for different sections of a roof if you choose. You can view individual details such as the total square footage and perimeter by clicking on the Layers Tab. To delete an entire layer, click on the button Delete Layer. Layers can also be ‘labeled’ to help identify different sections of the roof.
- Step 6 – Once you have completed your project, click the SAVE button to send the data to your account on the main website. You can proceed to manage, view and create reports from the main dashboard on the desktop website.
To clear the map just click the button at the top that says “clear”, then click “confirm”.
Using Pitch & Hip Factors
Estimating the square footage of a sloped roof from a 2D image is easy with our app. We provide 2 measuring tools to help you generate a more accurate estimate of the square footage.
- Pitch Tool – One way to measure a roof is to outline each section of the roof. You will have a different section on each layer. To use the pitch tool, click on the layer and press “PITCH”. Select the slope from the drop down menu and the adjusted square footage will be calculated automatically.
- Hip & Valley – A faster and easier way to measure a roof is to outline the whole roof on one layer and use the Hip & Valley tool. This factor will take into consideration all roof slopes to provide you with estimated square footage.
NOTE: You can only use 1 slope tool per layer. Using both will result in a gross overestimate of footage.
Button Settings.
Map: The map where you place pins, and find the wanted buildings.
Layers: Click here to see your current layers.
New Layer: Clicking here will automatically create a new layer
Clear: This is where you can clear the map. After clicking here you will get a notice asking if you really want to clear the map. For yes click “Confirm”, for No click “Cancel”.
Hide Pins: This will hide the red pins, and just show the blue area.
Hide Labels: This will hide the labels.
Note: You can only click one of the four blue bottom buttons, you cannot click “Hide Pins”, and “Hide Labels” at the same time. You can however click…
Hide Both: This will hide both Pins, and Labels.
Hide None: if you no longer want to hide the pins, and labels then click here. You’ll see everything.
Leave a Comment
You must be logged in to post a comment.